
Frequently Asked Question
How do I create a grid to plan a Barn Quilt?
A Barn Quilt is not a quilt but a single block painted on a large square board and hung outside on a Barn. The charm of Barn Quilts has caught on and inspired city dwellers to make and place a Barn Quilt on their home or fence.
There are two ways to begin —
Start with the 16-patch Barn Quilt Quick Pick in the grid paper.
Create your own using another paper and at your project’s size

Plan a 16-patch Barn Quilt
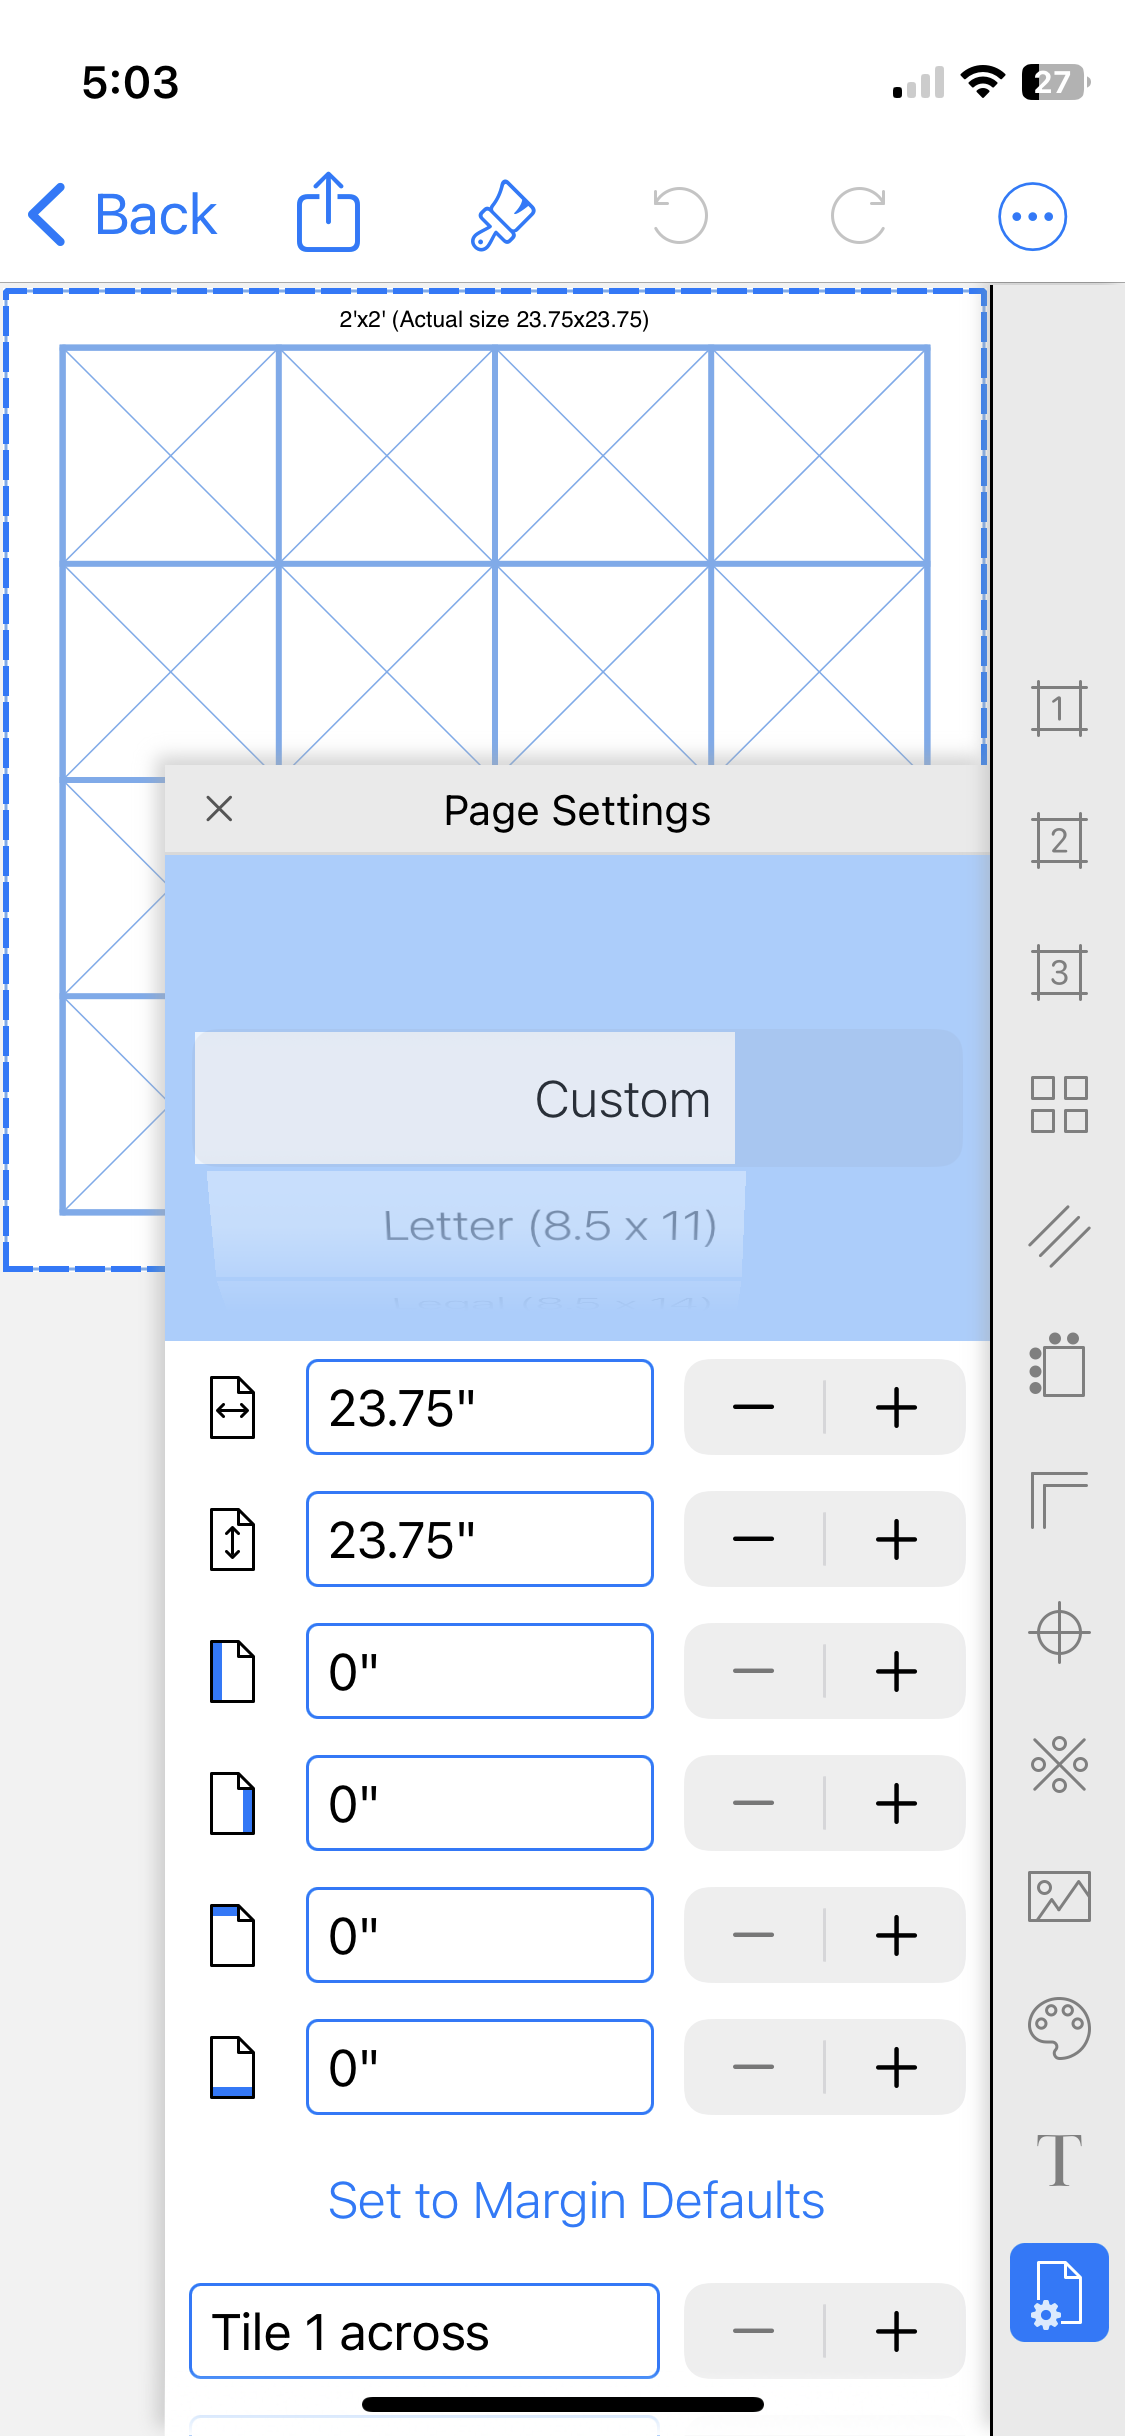
Begin by opening the 16-patch Barn Quilt Project Panel in Grid Paper.
The Major Grid, Border and Page Settings have been set to size of the key 'pieces':
5 ¼" patch size
1 ⅜" border width
23 ¾" x 23 ¾" block size (the actual/measure size of a pre-cut 2'x2' project board)
The dimensions of a pre-cut 2'x2' project board set the size of this block. The pieces are not even measurements — but manageable since this block is made with paint!


2. Create your own Barn Quilt Design
Decide what block you'd like to make as a Barn Quilt and pick the appropriate graph paper.
In that graph paper:
Set the Page Settings to the dimensions of your project board
Set the margins to zero so they are ‘out of the way’. and the layout is the same size as the board. I know this because the dotted blue line is the very same size as the page — there is no white border outside the blue line.
Create your layout
Pay attention to the layout overall, and adjust as needed so it is the same (or very close to!) size as the board. Open the design in Page Settings to check — the size of the layout and the board are the same when dotted blue line outlines the page (there is no white border inside the blue line.) If your design includes a border any ‘extra’ can be added to it.
Open in Paint and plan your design
Some layouts can get quite complex. However, by printing your layout at actual size on a large format printer you’ll have a pattern with the dimensions needed to transfer the design to the wood panel for painting.
This design was created using the Honeycomb paper.


